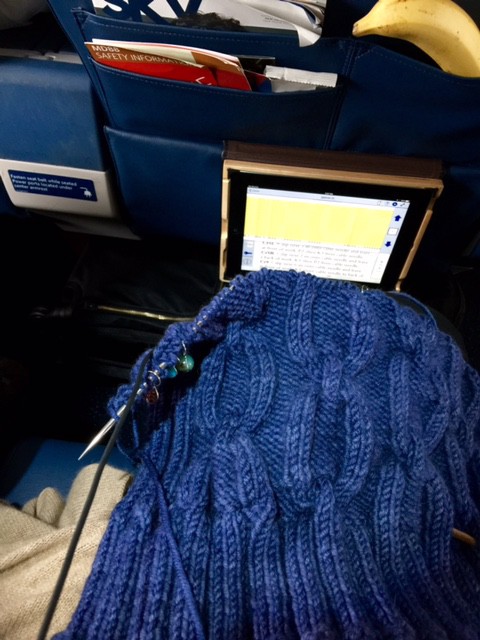
I’m hoping to make some progress on my Glacier sweater. It got put on hold so I could knit Ollie’s Arlo and a few other projects. I’m happy to be back to its delicious cables! I just finished the second repeat on the front.
Category: Uncategorized
A Quick Thanksgiving Weekend Project
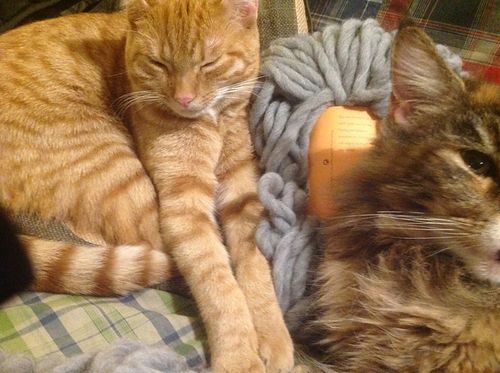
I wanted to participate in the Indie Design Gift-A-Long this year to show support for all of the talented indie designers who share their patterns with us. When I saw the list of patterns that were eligible included the Sweet and Simple Cushion, I raided my daughter's stash for some super bulky, Tahki, Sweet Montana yarn wool yarn she purchased while we were on a trip two summers ago. Perfect yarn for a fast, easy cushion. (I know the picture is mostly cats, but as soon as the yarn came out of stash and was living upstairs on the couch with me, it was clear it was one of those yarns that is so close to it's natural, sheep-y state that cats love it).
I had an old cushion with a really lovely goose feather core, so I decided to discard the worn cover and upcycle it with a knitted cover.
Miss Fig, my Boxer puppy, is every bit as happy with the results as the cats were with the yarn. I've got a bit of the gray leftover, and I'm so pleased with the cushion that I'm going to do a second one and stripe the gray with some think and thin handspun that incorporates Sari fabric.
This is a great pattern, starting with a clever figure eight cast on that leads into one of the best patterns I've seen for mastering magic loop. Although I taught myself to do it several years ago for a project I didn't go forward with, I never use it. But here, it was such a logical way of knitting the cushion and so easy to do that I think I've become a convert. You can easily conform the pattern to any size with an easy gauge calculation or knit something more complex — I think I'll do one with the cable from my Big Cabled Afghan pattern incorporated into it, but you could do any sort of cable or even make a "Weasley Pillow" with an initial in the middle of it. The possibilities are endless and yet another great reason to support Indie Designers. The bundle of all of the eligible patterns is here and you have until December 31 to complete your project(s), so there is no reason to sit this one out!
Knitting A Sweater For My Baby
My baby is turning 13 in a week. So I knit him a sweater. He picked out the pattern and the yarn. Truth be told, it was a little bit over my head, but I got a lot of help from my friends, and it's all finished.
I remember when it only took a few afternoons to knit him a sweater. That wasn't the case here — in fact, this one is a little bit big on me. But he's very happy with it.
The pattern is Arlo by Michelle Wang. She writes very smart, clear, patterns and seems to be obsessed with cables. I see a lot of her sweaters in my future.
The set in sleeves were, surprisingly, not as hard to do as I thought they would be, especially with the help of the Craftsy videos I mention in this post. They went in on the first try.
I'm sad that he's not a baby anymore. But he's a nice guy. He gets big bonus points for appreciating hand knits. I hope he's going to have as much fun wearing this one as I had knitting it!
Everyone is Fighting Over My Woolly Wormhead Mystery Knit Along Hat
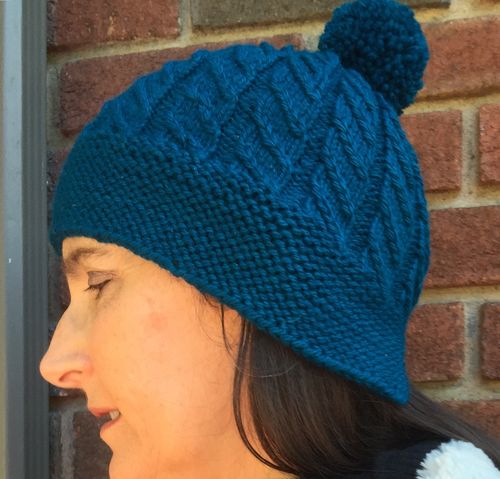
It looks cute on him, but he doesn't get to keep it. Nor does anyone else in my family who has tried to snag it. This is the Wooly Wormhead 2015 Mystery KAL pattern, and I'm so happy with the result! My.Precious.
My only disappointment is that the deep jewel-toned turquoise has eluded my rather lacking photography skills. It's a lovely blue green and I'm so glad I decided to participate in this MKAL, because it gave me the chance to dye some yarn for myself. Knitting with this yarn reminded me how much I miss dyeing yarn for Elliebelly. I'm so happy I have two leftover skeins to knit a cowl from.
The ponytail split in the back of the hat means it forms perfectly to my head. It's a really nice fit. Even though I don't look quite as nice as Ollie in it, I'm keeping this one for myself.
Big Cabled Afghan – The Pattern
I wrote and knit this pattern in 2010, intending it to be the first of a series of simple, beautiful projects that would work well in Elliebelly Yarns, which I was dyeing at the time. The original project page is here. Life + Career took a radically different turn a few months later, and as most of you know, I stopped dyeing Elliebelly to pursue a public service opportunity. And, I never wrote up the Big Cabled Afghan pattern. I had good intentions, but because the yarn it was written for was no longer in production, it didn't make any sense.
Fast forward to last year when the Plucky Knitter release her Snug Bulky yarn, and I realized that in addition to finding the yarn of my dreams, the perfect yarn for the Big Cabled Afghan was in front of me. It hasn't been a fast or nearly as efficient process as I had hoped, but my sweet friend Helen, an outstanding knitter, took on the challenge of knitting the pattern in Snug and we have a pattern ready to be released into the wild. I hope others will knit it and share their comments with me so that I can continue to enhance the pattern and provide additional advice on sizes and other details. It's a simple, basic cabled pattern, easy enough for an adventurous beginner but the cables will keep the interest of a more advanced knitter.
I have plans to do a neutral version for our screen porch.
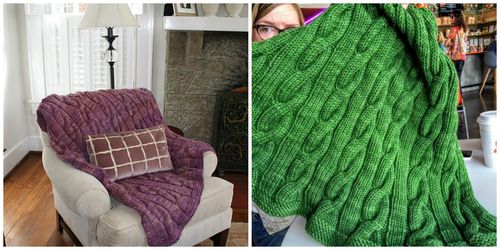
Here is the original version compared to Helen's lovely version, knit in Plucky Pup Tent.
I hope you'll dive right in — I can't wait to see different versions of it knit up. You can access the pattern on Ravelry or download it here. Please let me know if you have any corrections, ideas, or pictures to add. Happy Knitting!
Corrected Link to Download the Pattern
Knitting Was The Easy Part: Finishing A Sweater
Unless you are one of the whiz kid knitters I hang out with on Ravelry, you are probably a lot more like me – someone who cobbles together a few minutes here and there in a busy day full of work, family or both to get in some quality time with your knitting. I'm inspired by watching my friends who put together a sweater in a week or two, but that's just not me. The Arlo sweater I'm working on at the moment is the quickest sweater I've ever knit. It has been on my needles for 52 days and counting, although it did get set aside to knit several hats and I worked on a few other projects when it was in time out after my first disastrous effort at putting on button bands.
This is the first sweater I can remember doing in a very long time that was knit in pieces and required finishing. I did several in high school, but I really don't remember the finishing. My guess is that with a full family of knitters, there was a lot of support around. And although I've knit a few baby sweaters in pieces, there was always plenty of support in my local yarn store. I never really focused on the finishing process.
Arlo has been a different story. For one thing, I'm knitting it on airplanes and late at night, so there isn't any in-person help around. And, I'm a braver knitter than I have been in the past. I'm also less willing to accept bad results, and have become more likely to rip them out and redo them so I'm happy with them.
I wanted to share some of my favorite finishing tips with you, in hopes they might make your life easier and your knitting happier, too.
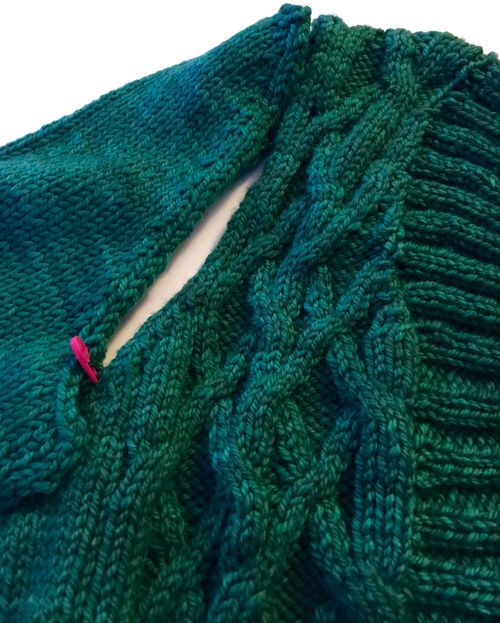
The first part of finishing Arlo was shoulder seams. I looked at them and was mystified. I could have winged it — we all get that basic idea of matching up like to like — but I wanted to find "the right way." Although I often like to look at words and charts, and find TechKnitting to be incredibly helpful in general, for seaming I wanted video. I found help on Craftsy. (One tip here — they frequently have a free coupon or a half off sale. Look around, there's a lot to like here and plenty of opportunity to purchase at less than full price).
For the shoulder seams, I really liked Chris Bylsma's Seaming Hand Knits. She made it easy and promised it would work like magic. It did! I can't wait to do it again, and I love my beautiful, worked-with-no-problem-on-the-first-try shoulder seams. Seaming Hand Knits seems like it should be in every knitters arsenal, with great tips on all kinds of seams as well.
After my first debacle with the button bands and collar, I decided to pick up Anne Hanson's The Essential Guide to Finishing Hand Knits and see if watching her process would help. It turned out that my problem had more to do with misreading the pattern than technique, and the second go round was much better. I liked Anne's tips though, and she has a great cast off for button bands and collars that makes the ribbing behave very nicely. I'm forever indebted for that one! I pinned all the pieces together and it looks like my knitting math held up and I've got a good fit (the largest size in the pattern was a bit too small, so I had to size up).
Next, I'll be on to seaming. I'm going to set in the sleeves first, and then do the sleeve and side seams. For that, I watched both Chris and Anne's classes, and also, referred to the construction section of Amy Herzog's Sweater Modifications for a Custom Fit. Even though watching videos consumed most of my knitting time today, I liked seeing the different approaches and felt like I got a lot of insight watching different people explain the same concept. Even though I would like to finish up tonight — I've done the first few inches on the right sleeve — I'm going to wait for good natural light tomorrow so I can make sure the seams match up and I'm seaming in the right place on each piece of fabric. Arlo is going to have to wait a little bit longer. But at least the knitting, the easy part, is done.
Buttonhole Success
It has been gorgeous this week. I was fortunate enough to spend some time, knitting with my Mom in the comfy chairs on her screen porch.
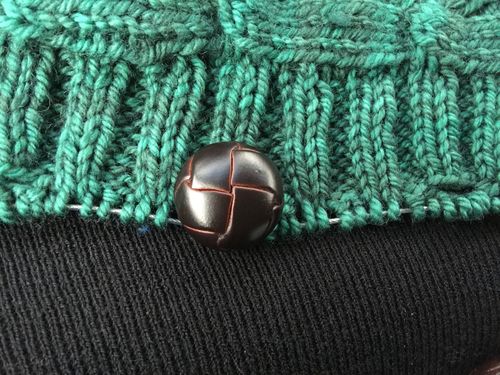
That got me up to the point where Arlo calls for the insertion of one-row buttonholes. I was not impressed with this approach the first time through. They looked sloppy and the ribbing patterning was off afterwards. On reviewing the pattern, I learned that this was because I had failed to read the directions properly. Seriously — when there are three steps to doing the buttonholes and you only do the first one, they aren't going to look good. I really liked them this time around, both the process of making them and the result.
I can't wait to finish up so I can add on the cute little leather buttons I purchased for this sweater awhile back. They fit perfectly in the buttonholes and I think they will be just the right finishing touch.
